The Revision B boards for the simple iPad Retina LCD breakout have arrived. As I mentioned last time, this version fixes the mis-numbering of DisplayPort lanes that was present in Revision A. A few additional tweaks were also made. Take a look at the previous part for a more complete summary of the changes.
I have built up one board and tested everything out, and luckily this time everything seems to be working great. Have a look:
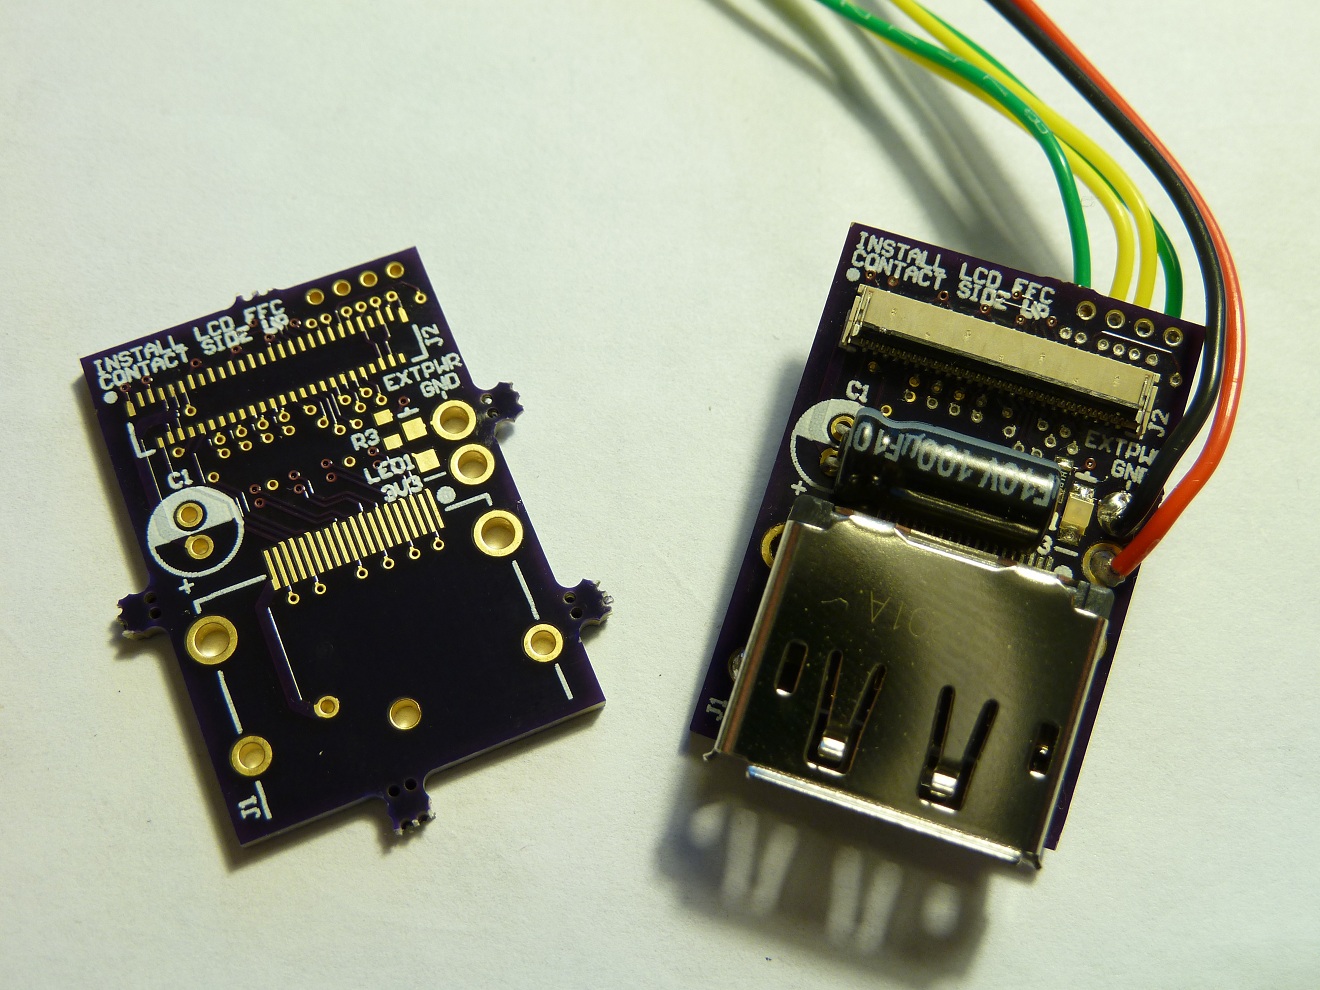
Simple Breakout top side (bottom Gerber).
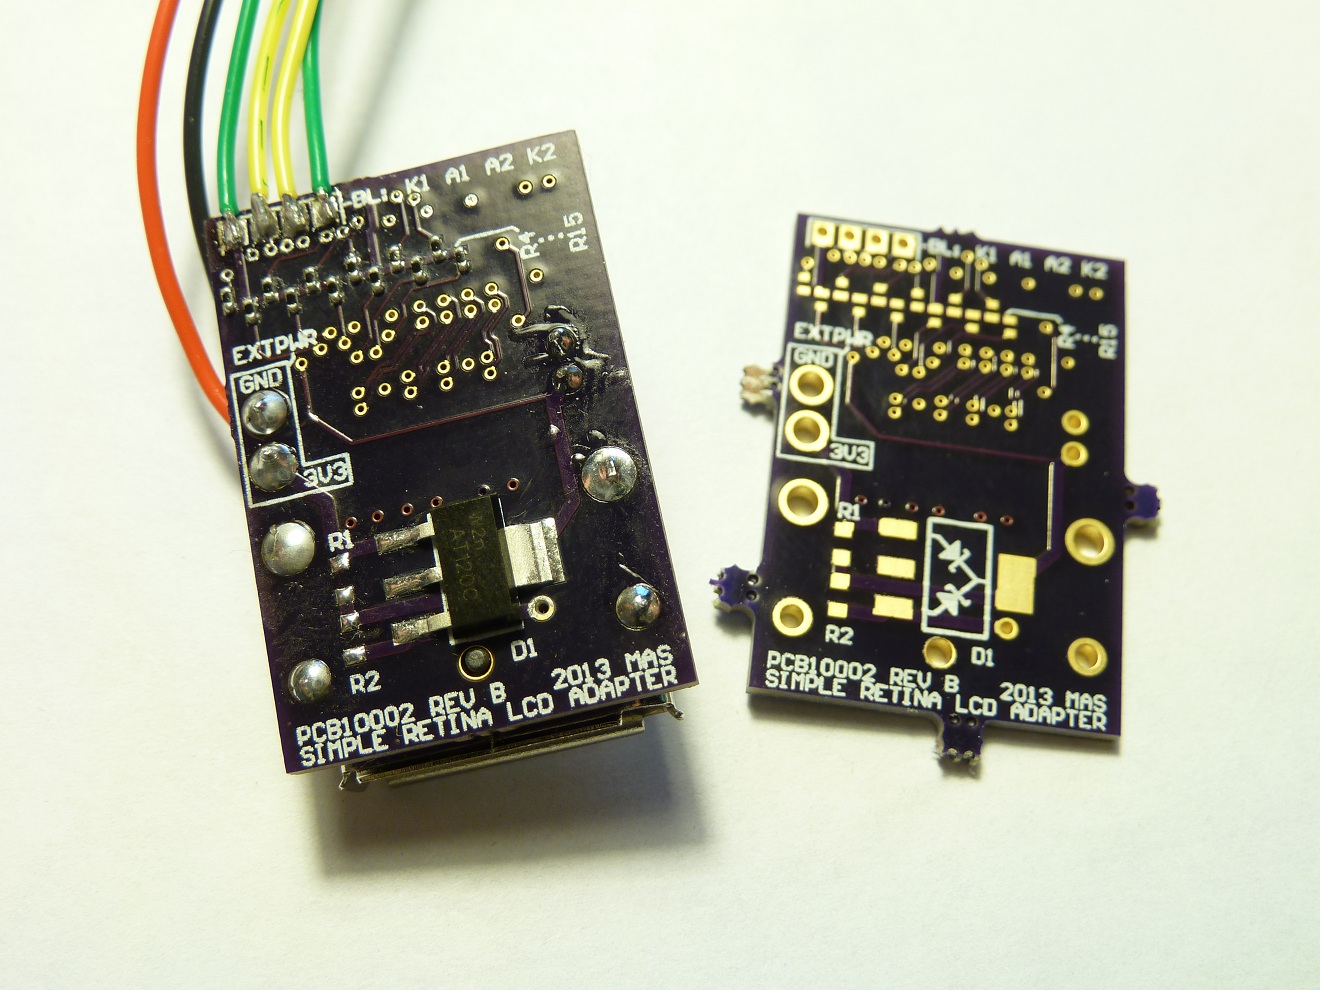
Simple Breakout bottom side (top Gerber). Ignore the flux – I am out of flux remover and didn’t want to delay this post.
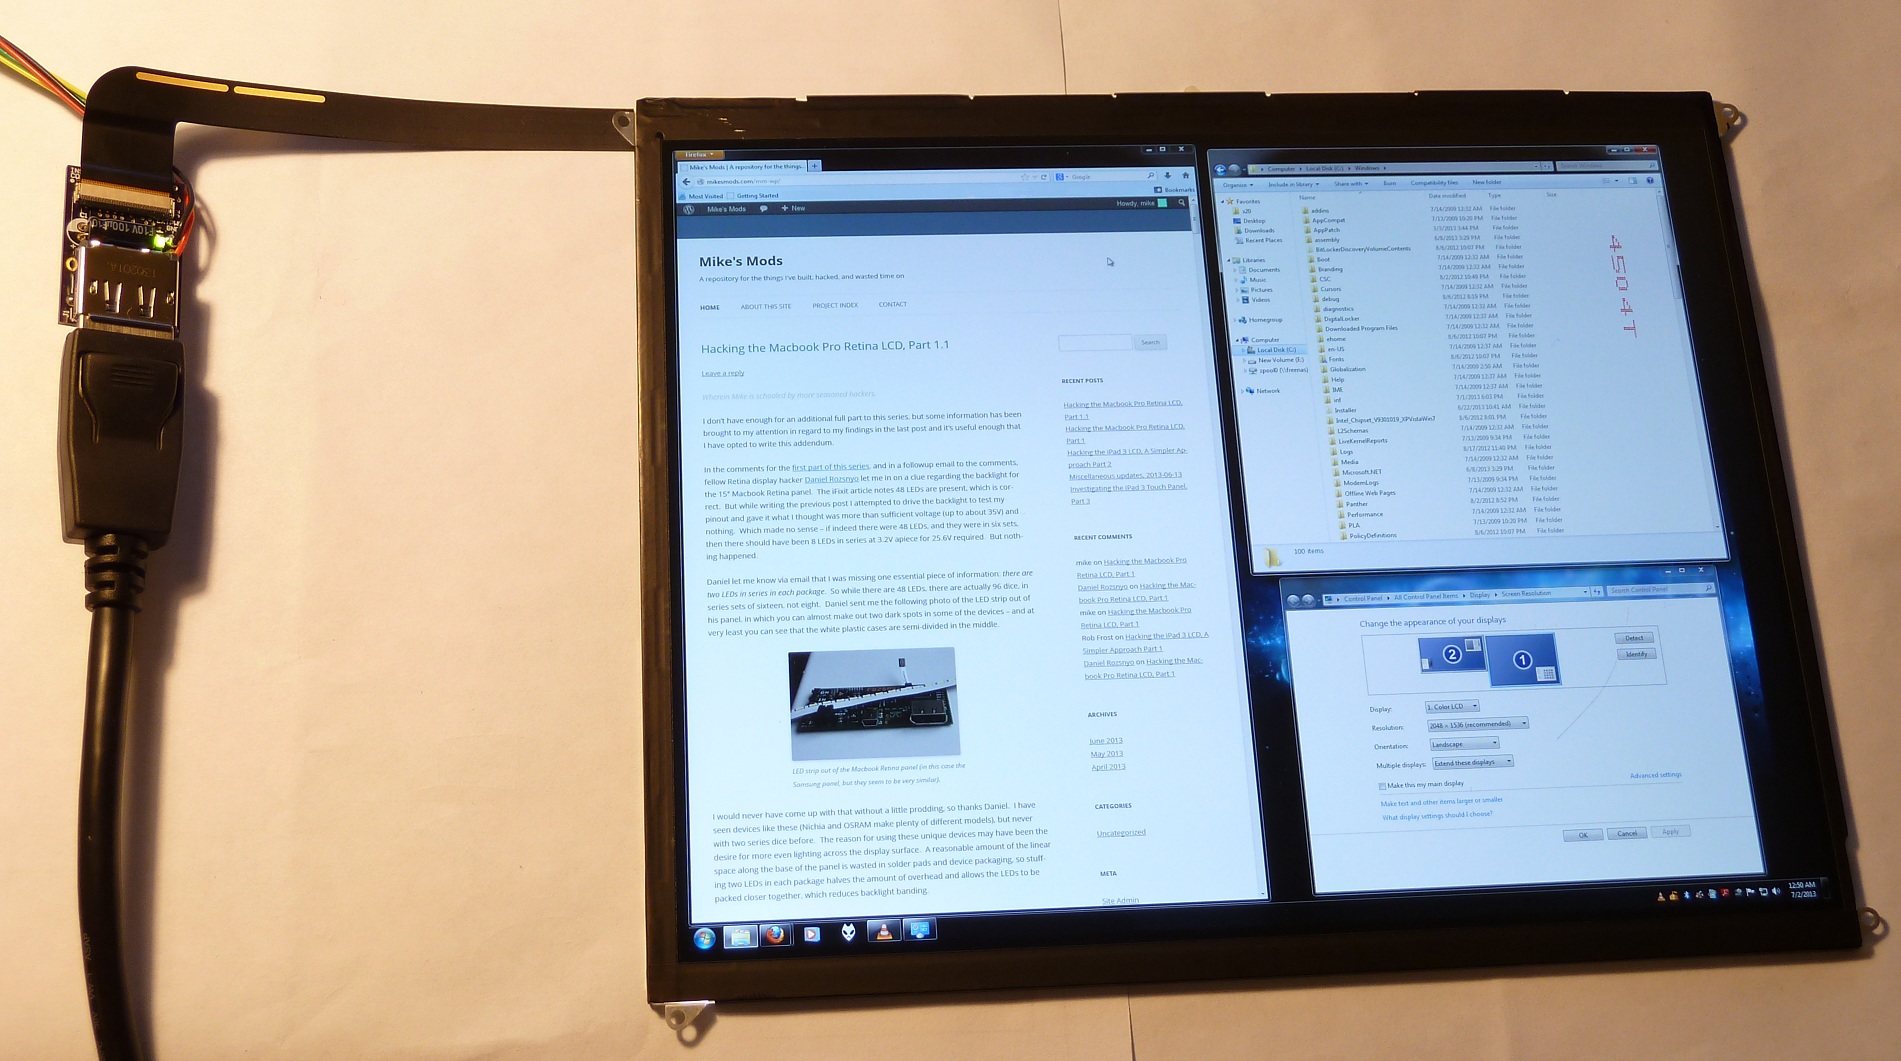
Simple Breakout in action. No longer are magnet wire jumpers needed, hooray!
I noted in the comments for the previous part that I was attempting to etch stencils to speed assembly. Using the method outlined here, I attempted about 20 times to reliably etch a stencil from a soda can, trying various transfer papers, heat/pressure application, and printer settings, and I never landed on a particularly reliable method. The problem is that the pins on the connectors of this board are really small (FFC) or really close together (DisplayPort), and the ratio of depth to web thickness means it is very difficult to etch enough from all areas without overetching any others. I finally landed on one that was halfway okay, but I still spent a lot of time pushing paste around with a toothpick. If I knew I was going to have to build a few more of these, I’d definitely order a professionally-made stencil.
But now that this board is on the shelf, I need to shift my focus to the “real” iPad interface, which has more or less taken a backseat lately, so feel free to take this design and order your own, modify it to suit your needs, etc. I also have some boards and stuff left over if you don’t want to buy your own directly (even though three boards is only $10 from OSH Park). Shoot me an email or leave a message if you want something and we’ll see what we can work out.
I’ve re-linked the board documents here. Do with them as you see fit. Happy hacking!
- PCB10002 REV B GERBERS (22K ZIP)
- PCB10002 REV B LAYERS (253K PDF)
- PCB10002 REV B STENCILS (1.1K ZIP)
- SCH10002 REV B (201K PDF)
<< Previous post in this series … Next post in this series >>
Hi Mike,
Thank you very much for these nice posts!
I got an iPAD3 LCD from Alibaba and now I need to get one adapter board.
I was planning to order one directly from OSH Park, but if you have a Rev.B board to sale me I think it will arrive faster.
I’m planning to use this LCD to directly sensibilize the virgin PCB board covered with photographic emulsion to create PCB at home. The idea is similar to this home-made “photocopying”: http://www.youtube.com/watch?v=op00xgiD7sc
Do you have a board to sell me? I just need to buy the board, I already ordered the connectors and components from Mouser.
Thank you very much in advance!
BR,
Alan
Sure thing. I’ll send you an email.
If you have parts kits for sale that would be awesome.
I found this while googling about and was unable to get to the start of this series. How are you handling backlight control?
Thanks and pretty cool blog.
The answer is: I’m not really. This board was designed mostly for the DIY Projector crowd, where they would be removing the backlight, so backlight control is as simple as possible: each of the twelve strings is current-limited with a resistor. Apply 19-20V to the backlight pads from an external source, or use one of the $3 adjustable boost supplies on eBay for some variation capability. This is actually a side project to my “proper” controller board, which has a PWM driver onboard. I’m currently working through some small issues on that one but should be able to release it in a month or so (OSH Park takes SO long to ship boards…)
I just got in two dozen more boards so kits are certainly available, if you are interested. I’ll send you an email.
PS: Use the “Project Index” link at the top or the “Previous part” / “Next part” links at the bottom of the post to move around 🙂
Hi Mike,
Totally interested in getting one of your awesome IPAD 3 (DP) adapters!
How much will it cost for an assembled board? (assembled includes presoldered wires I assume?)
I do love to tinker, but for starters I’d like to get the most assembled version you’re willing to offer 🙂
Much appreciated! Love your blog.
Daniel
Pricing is currently noted in the Part 4 post: http://mikesmods.com/mm-wp/?p=279 . I’ll send you an email with more information.
Hi,
is it possible that you share your project files with me.I think we both use the Altium desginer.
Maybe in the future I could order some Boards for you and send them to you. I always have the possibility to order a few more prototypes.
regards
I’ve been a bit lazy on the backend with my design files, so it’ll take me a while to get things cleaned up, but I’ll try to get some things out if people will be able to use them. Don’t hold your breath, though, I don’t have an estimated time for completion.
I’ll take what I can get.
Hi,
I need to order a Multi-PCB-board next week.
On this I still have room for some of the boards.
Or maybe you want to try another version?
regards
I’m not sure what exactly you’re looking for. If you are wanting an updated iPad controller board by this week, that’s not likely to happen… lots of 11-hour workdays are on the horizon so I probably won’t get much of anything done for the next few weeks.
If you would like the documents in order to fix them yourself, that might be possible, but it won’t be as easy as pasting the design onto your panel, there are a couple of critical issues to fix (mis-numbering of DisplayPort lanes, missing crystal for USB functionality). You will also need to re-draw the differential pairs if you are using a different stackup than the OSH Park one for which the board was designed (6.7mil height, 1oz copper, Er=3.66).
Hi
I do not understand English very well, and I have 3 questions.
Do I understand correctly that you are selling the controller board for connection LP097QX1 to a computer ?
Does this controller board need extra power supply or any other extra-things?
Can I order one?
Thanks!
To answer your questions in order:
1. Yes, my boards connect a LP097QX1 to a computer, although the computer needs a DisplayPort for it to work.
2. I understand from your other post that you are planning to use it as a light filter. For this you do not need to connect the backlight, so you will only need to provide 3.3V to power the panel. DisplayPort cables usually do not supply power so you will need to use an external power supply.
3. Can you order one? Not right now, unfortunately. I don’t have any parts left right now and I am planning to change the board, so I have not ordered any more. Please keep an eye out here for any updates, and I will try to remember to send you an email when boards become available again.
Hi, let me know when your doing kits, I would love to use these devices looking at USB digitisers to,
Will do.
Hey, again here. Let me know if you come up with some more boards.